Project settings: Categorization
Tags are your own labels for tickets, for example "Customer feedback", "Tech debt" or "Quick win". They add a second order next to hierarchy and states: you recognise the tickets of a topic at a glance and can filter by them. In the Categorization tab you define which tags your project knows.
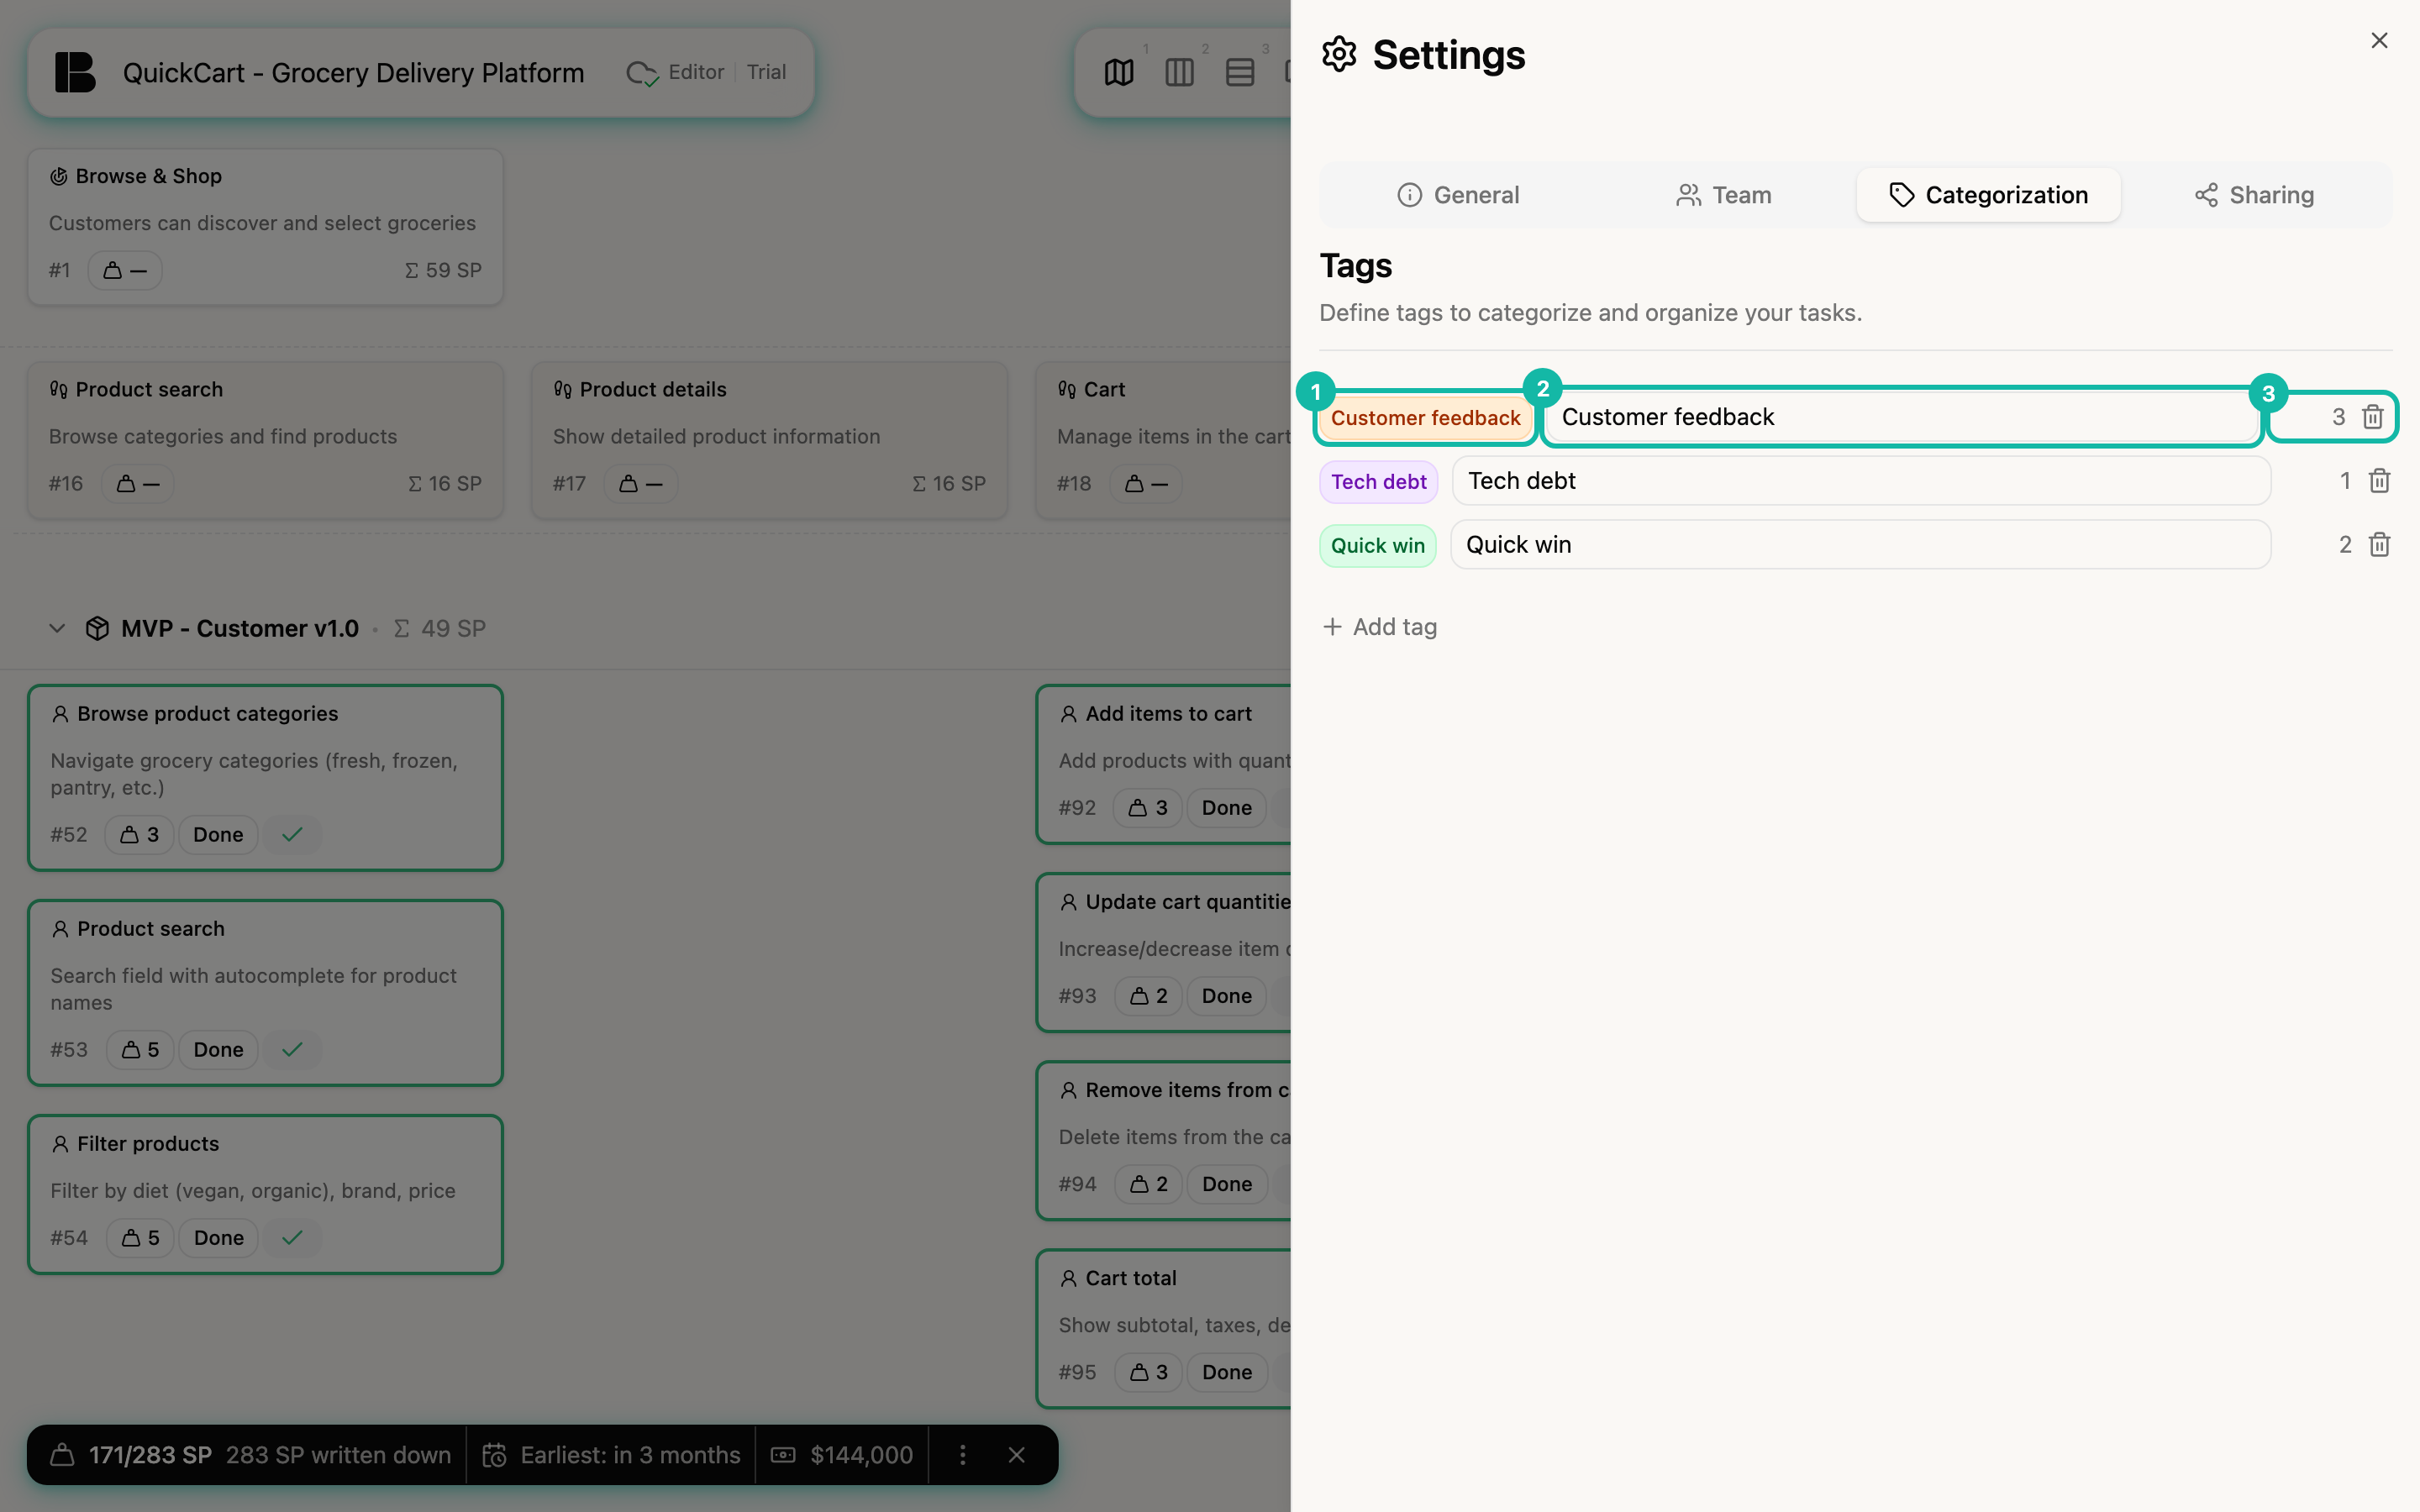
Creating a tag
- Click Add tag at the bottom. A new row with a blue tag appears.
- Enter the name in the Tag name field. It is saved as soon as you leave the field.
- Click the coloured marker at the front of the row to pick a colour. Twelve colours are available. The colour is saved immediately.
A row without a name appears as tag. So give each new tag a name right away.
Usage and deleting
- The number on the right of the row tells how many tickets carry the tag, across all tickets of the project, open and done. Hover over it and it reads, for example, "3 tasks carry this tag".
- The trash can deletes the tag definition immediately, without asking. Look at the number first: if the tag still has tickets, you see here what you are removing.
Giving tags to tickets
A tag only takes effect once you give it to a ticket: in the ticket, under Tags, use Add to pick an existing tag or create a new one right there, see Basic fields. The tag then appears as a label on the card. In the filter panel the project tags are listed under Tags; if you pick several, a ticket must carry all of them.