Filters
Filters hide what you don't need right now: just one Epic, just the current Iteration, just tickets with a certain tag. They work across views; you don't have to set them again per view, and you can use them to build your own views.
Open the filter panel
Press ⌘+J (Windows and Linux: Ctrl+J) or click the filter icon at the top right of the project. Alternatively, choose Open Filters in the command palette. A number on the filter icon shows how many filters are active, and a small dot tells you that your filters differ from the project default.
| macOS | Windows / Linux | Action |
|---|---|---|
| ⌘+K | Ctrl+K | Open search (command palette) |
| ⌘+J | Ctrl+J | Open the filter panel |
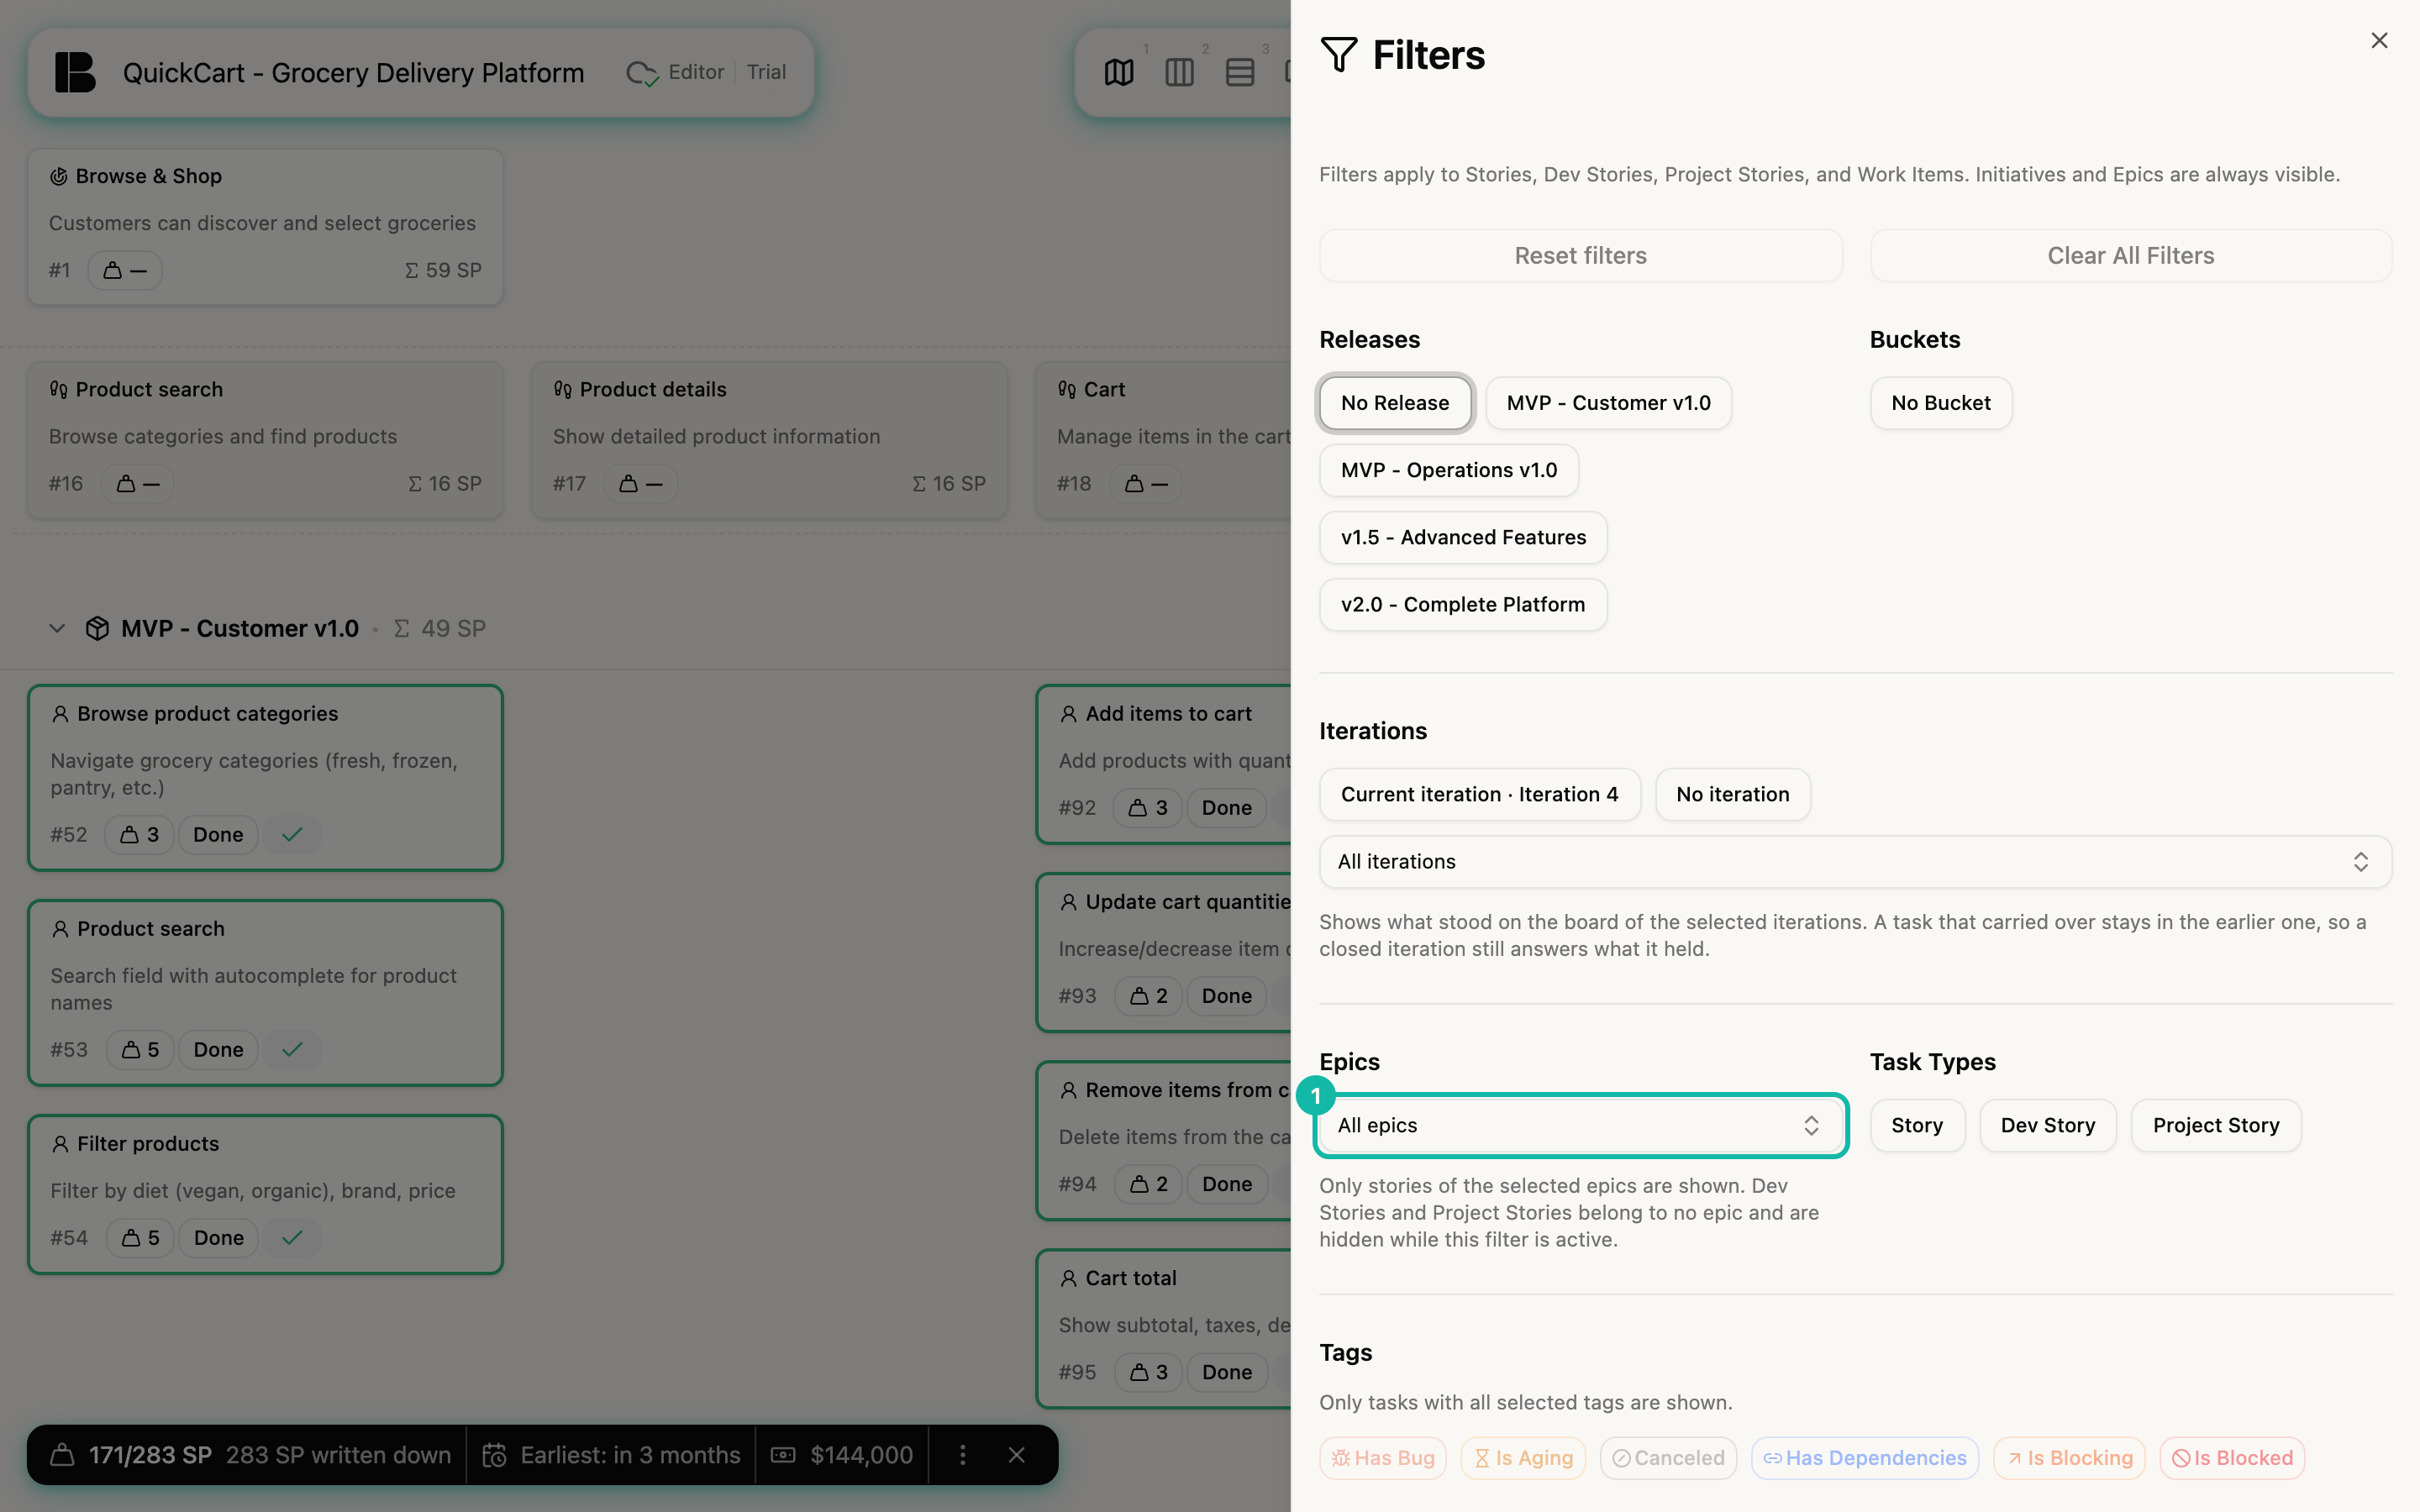
Filters apply to Stories, Dev Stories, Project Stories and Workitems. Initiatives and Epics always stay visible.
What you can filter by
Within a group, one match is enough (two releases show the tickets of both); across groups, all conditions must match. Only for tags, all selected tags must be on the ticket.
| Group | Effect |
|---|---|
| Releases | Tickets of specific releases, or No Release |
| Buckets | Tickets of specific buckets, or No Bucket |
| Iterations | Current iteration, No iteration, or one or more specific iterations: shows what stood on their board, including closed iterations |
| Epics | Only Stories of the selected Epics. The field is searchable and grouped by Initiative. Dev Stories and Project Stories belong to no Epic and disappear while this filter is active |
| Task Types | Story, Dev Story, Project Story |
| Tags | Your project tags plus Has Bug, Is Aging, Canceled, Has Dependencies, Is Blocking, Is Blocked |
| Progress | Idea, Draft, Ready, Todo, Doing, Done |
| Status | Open or Closed |
Selected options are filled dark; among the tags, the unselected ones are dimmed.
Example: only the Checkout Epic
- Open the filter panel with ⌘+J.
- Under Epics, click All epics, type
Checkif you like, and choose Checkout. You can add more Epics. Clicking the small label below the field removes an Epic again. - Close the panel with Esc or by clicking next to the panel.
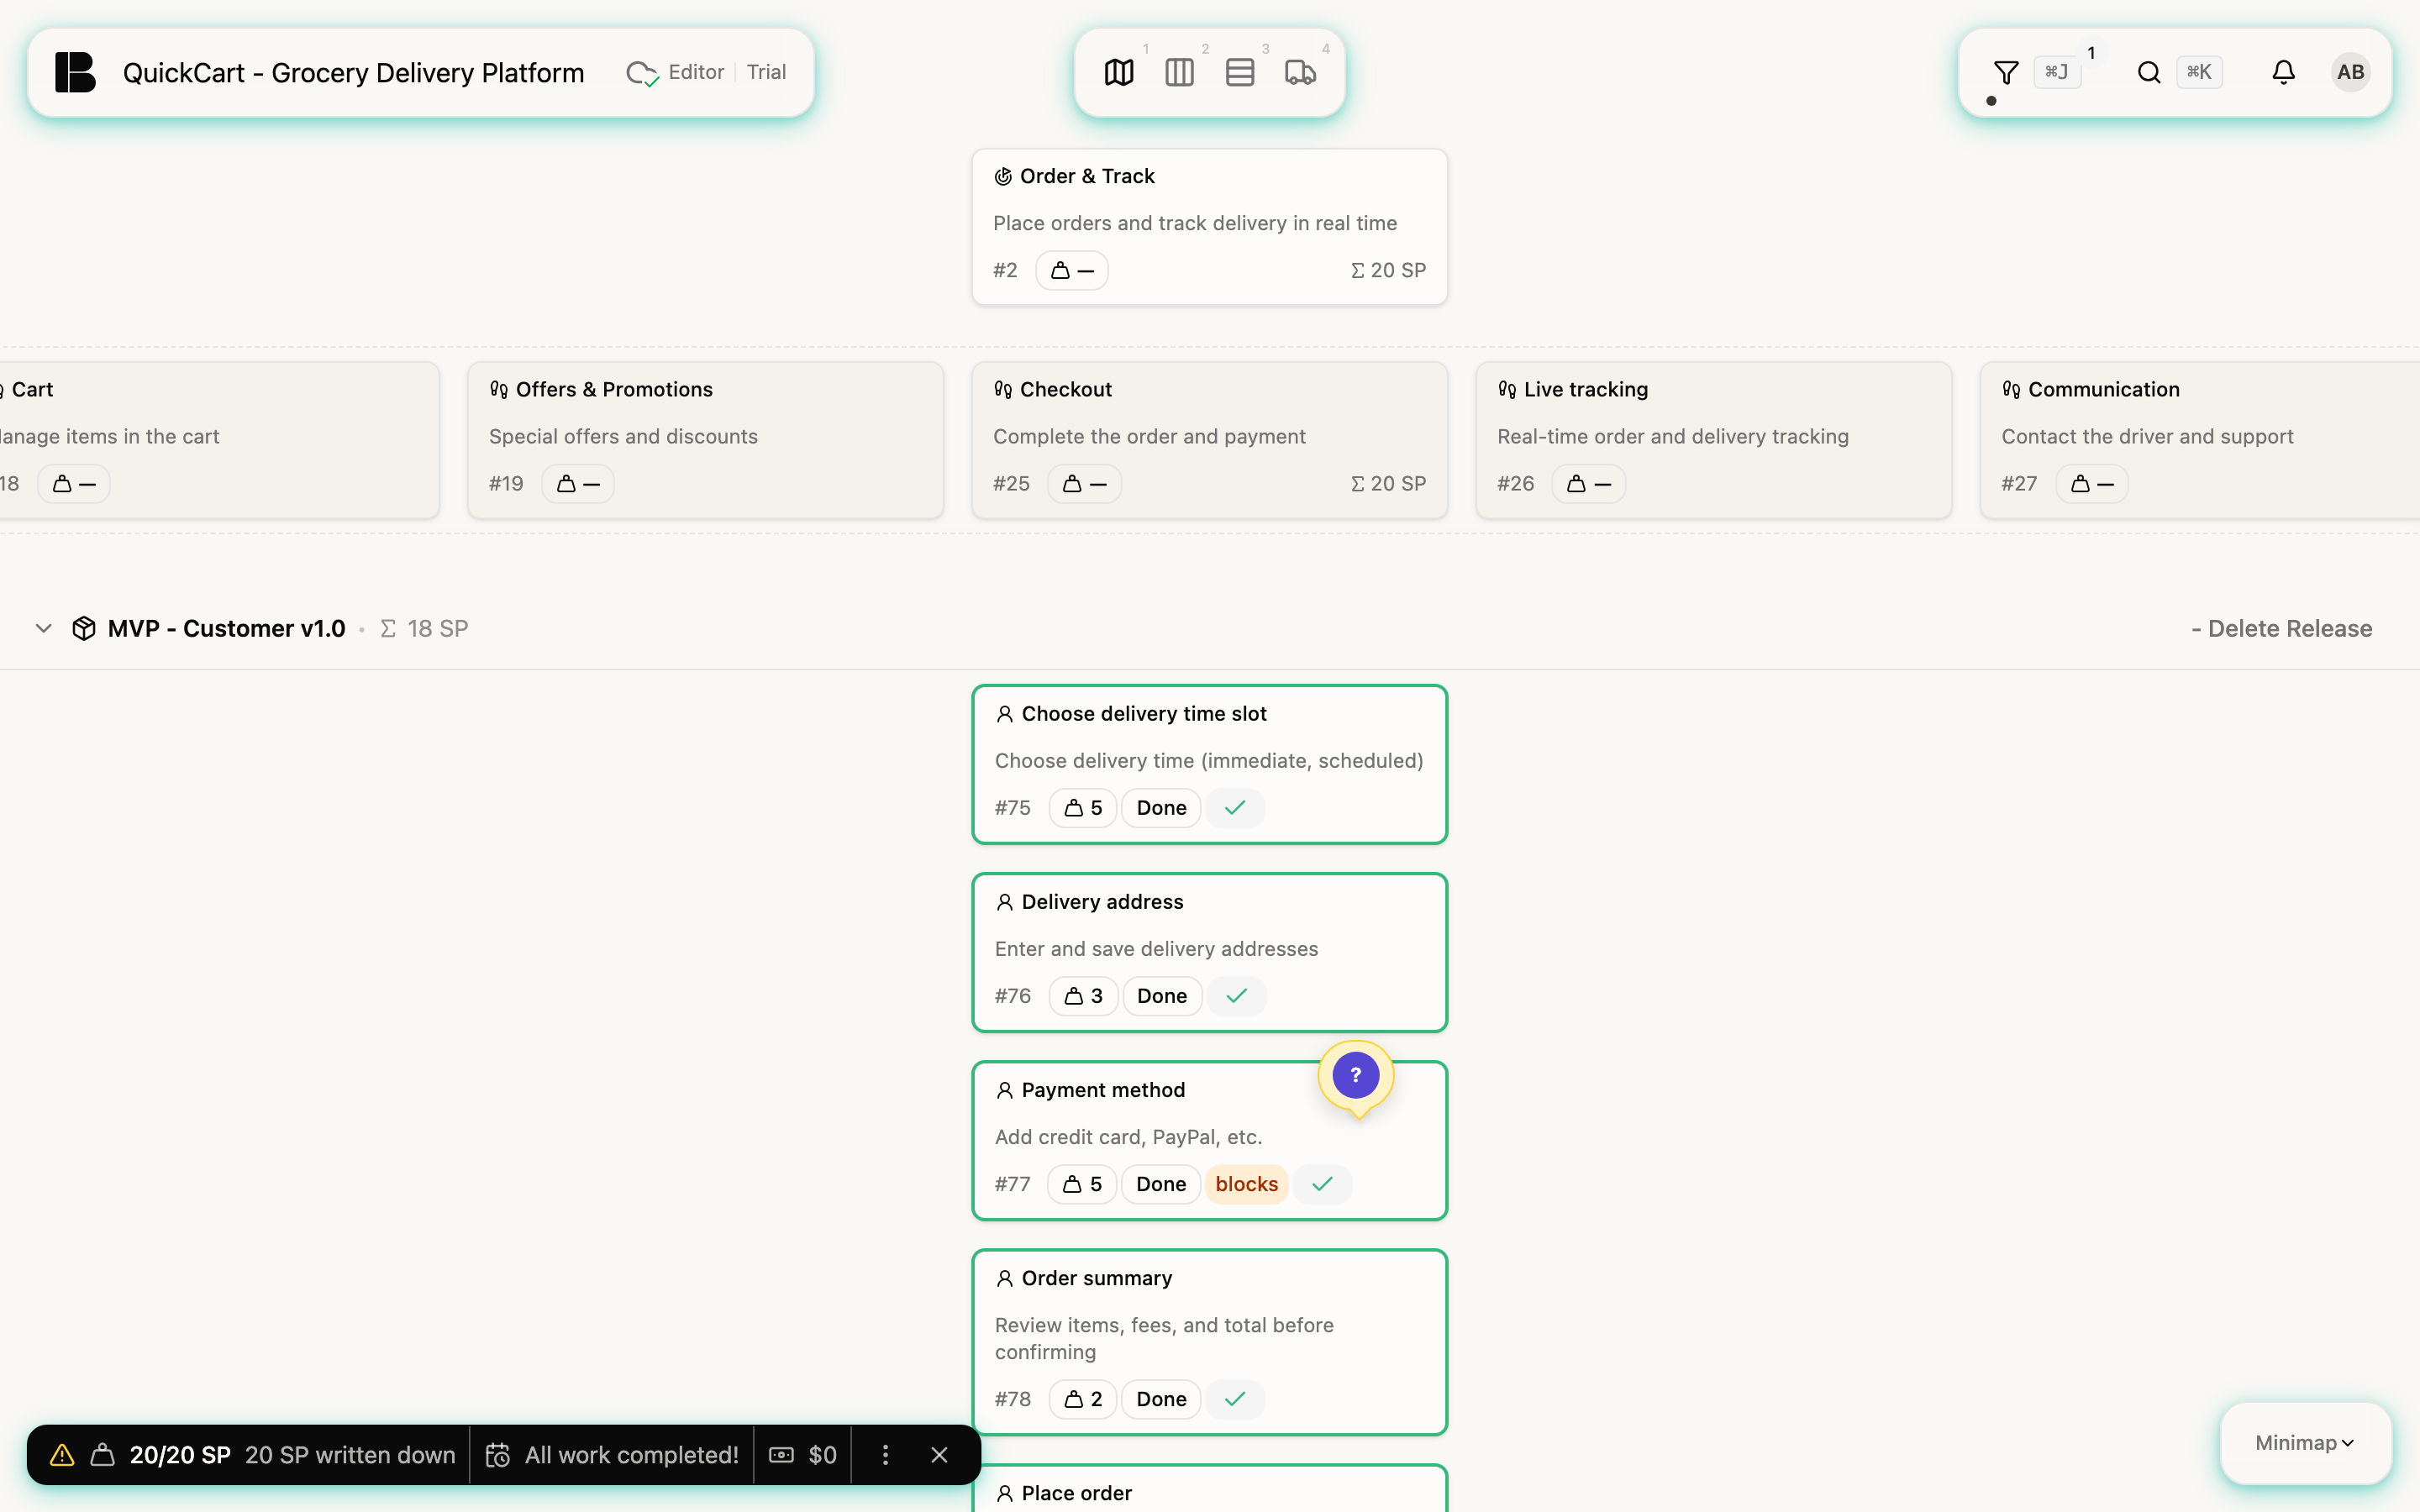
The Storyboard now shows only the Stories of Checkout. The same selection applies in Kanban, List, on the Iteration Board and in the Progress and Flow evaluations (see below for which views respect the filter).
Filters apply everywhere: build your own views
A filter does not belong to a single view but to the project in your browser: you set it once and see the same section everywhere. On top of that you can build your own views without changing anything in the project.
| View | Respects the filter? |
|---|---|
| Storyboard, Orbit | Yes, numbers, rings and shares count only the section |
| Backlog (Kanban, List, Estimation View), Iteration Board | Yes |
| Progress, Flow | Yes, they recalculate for the section only |
| Estimation Widget | Yes, in every view where it appears |
| Roadmap, Delivery Timeline, Iterations overview | No, they always show the whole project |
A few ideas with QuickCart:
- Evaluating a section. Filter by the Epic Checkout, a Release or a tag and open Progress: scope, done and forecast then apply to those Stories only. That answers how far along MVP - Customer v1.0 is. The same filtering shows in Flow how long the Stories of one theme take.
- Iteration retrospective. Under Iterations, pick a completed Iteration. The Backlog (including the Closed column) and the Flow metrics then show only Stories that were on its board and how long they took. That is a good basis for the team conversation. The Iteration Board itself always shows the active Iteration.
- Cost forecast as a what-if. Filter on a scope, such as a Release or a few Epics, and read the Estimation Widget at the bottom left: it calculates points, remaining points, earliest completion and remaining cost for the section only. That answers what this scope will probably cost if the whole team works on it. The remaining cost is rounded up to whole Iterations (Iterations needed times cost per Iteration), so even a small section costs at least one Iteration. The widget warns with a triangle that it uses the velocity of the whole project, so the estimate may be too optimistic. Stories without an estimate of their own count with the median of the visible Stories (with Rapid Estimation switched on, the median of the whole project), see Automatic estimates.
- Themes and tags. With a tag you assemble a set of Stories that you follow through all views without mapping it in the structure.
Betterplan remembers your filters per project in your browser; they apply to you only. If the team should always start with the same section, save it as the project default.
Although the filter icon appears there too, the Delivery Timeline always shows the whole project. The Roadmap and the Iterations overview hide nothing either. The Estimation Widget at the bottom, on the other hand, follows the filter there as well.
Hide or dim
Filtered tickets can disappear in two ways:
- Hide: the cards are gone completely.
- Dim: the cards stay in place but are dimmed to 30 % opacity, so you still see what surrounds your hits.
The project setting Hide Filtered Tasks by Default decides which one applies. Find it through the command palette (Open Settings) on the General tab under Display Settings. There is no switch in the filter panel itself. The setting takes effect when you first open the project. If the team has saved a project default (see below), that default carries its own choice between hiding and dimming, and the switch in the settings no longer applies. In the QuickCart example, hiding is switched on.
Reset filters
Two buttons at the top of the panel help you tidy up:
- Clear All Filters removes every selection, including those of the project default.
- Reset filters brings back the project default (see below). The button is only active when your filters differ from it.
Betterplan remembers your filters per project in your browser. On your next visit they are as you left them, and they apply to you only.
Save filters as the project default
The Project Default is the filter everyone starts from when they open the project. It is handy if the team usually only wants to see the current Iteration, for example.
To set it:
- Set the filters you want in the panel.
- Scroll all the way down to the Project Default section.
- Click Save as project default.
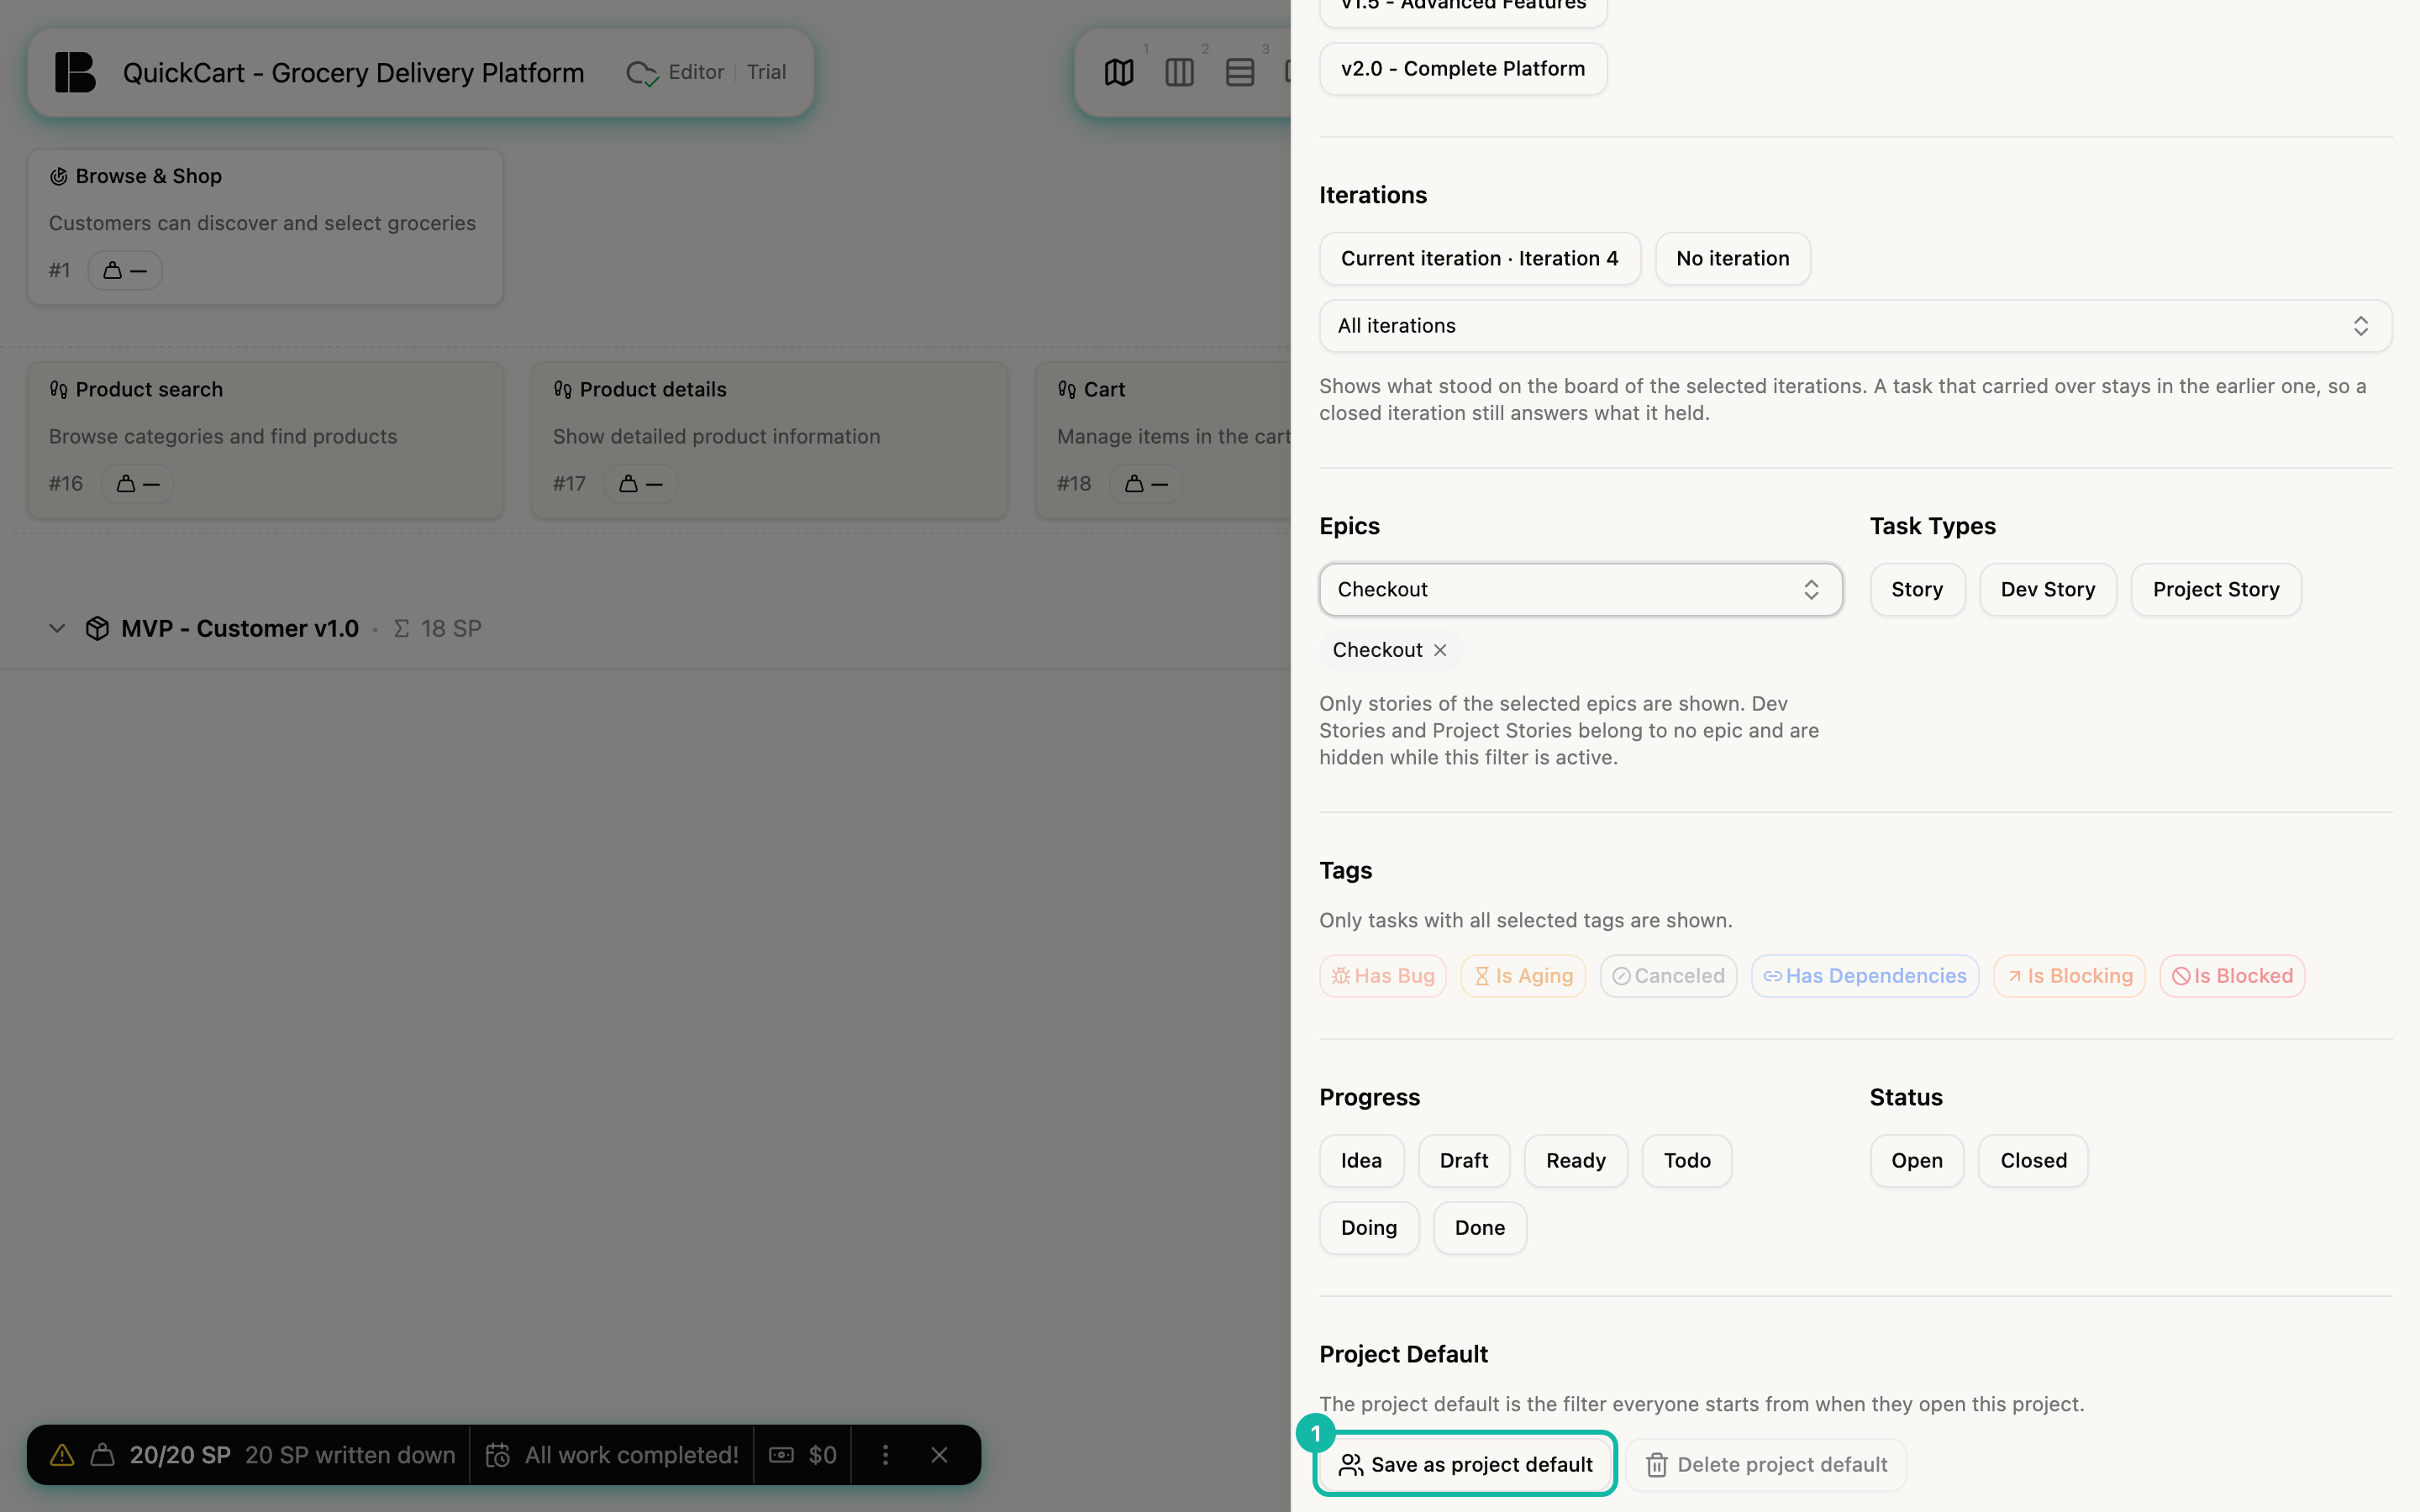
The default applies to the whole team: anyone who hasn't set their own filter follows it, even if someone changes it later. Delete project default takes you back to the empty filter.
The project default affects all members of the project. Save it only if the team really wants it as the starting view. In read-only sessions, the Project Default section is missing.